
Key Takeaways
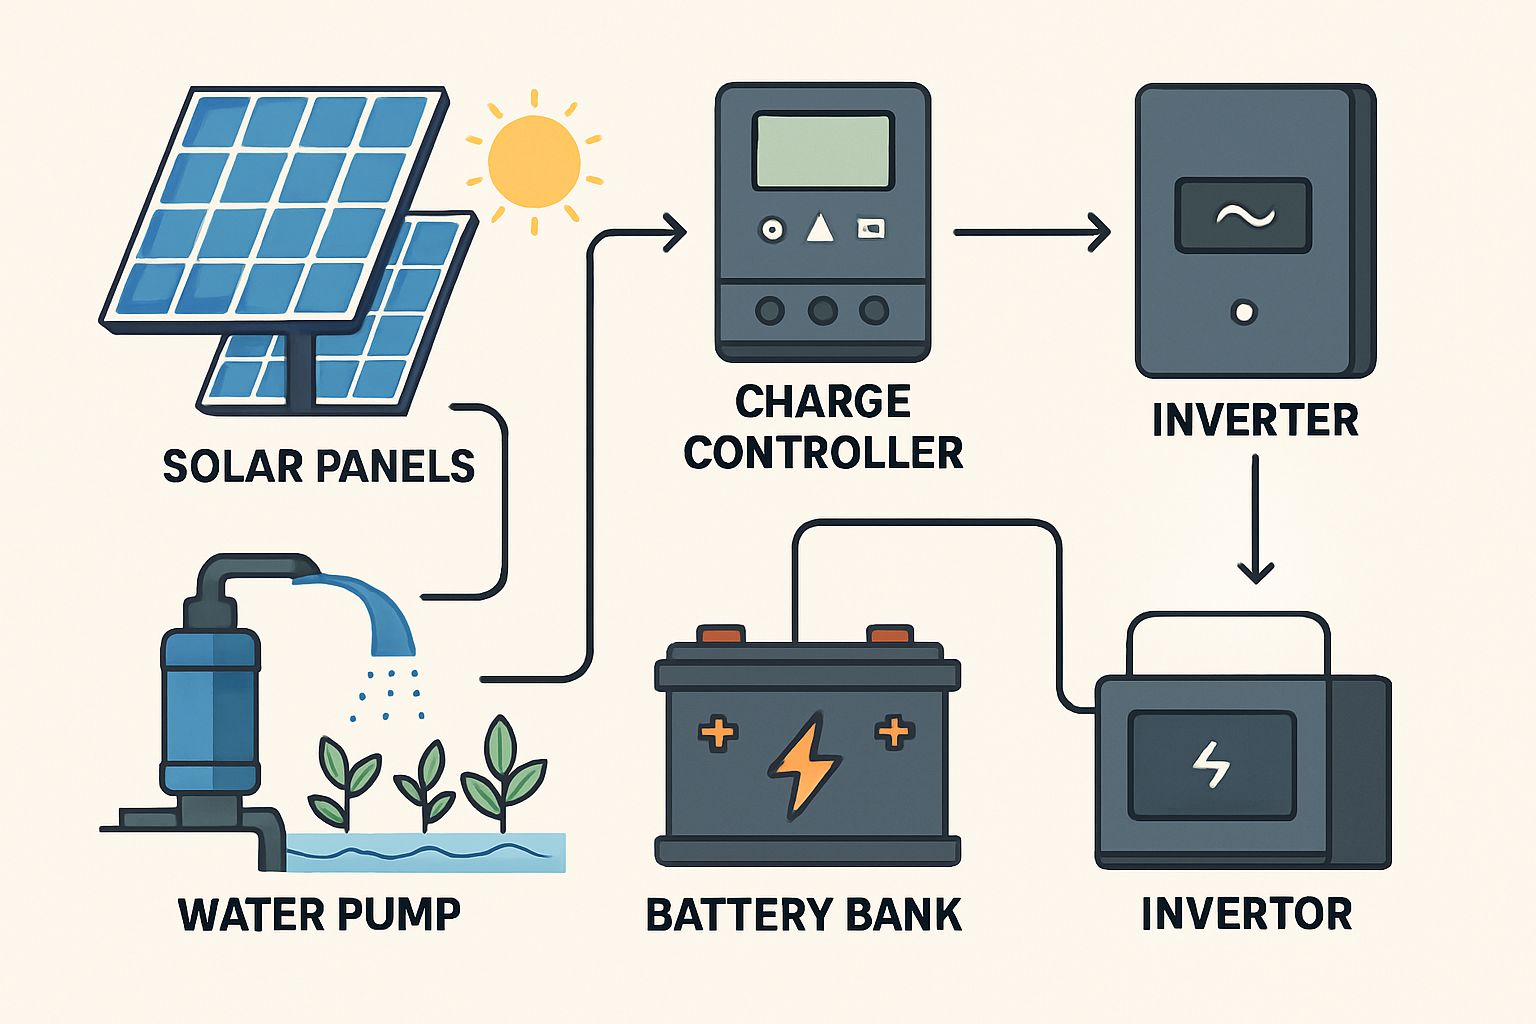
- A solar-powered irrigation system runs on five core components: solar panels, a water pump, charge controller, battery bank, and inverter — and each one must be correctly sized to work together.
- Choosing the wrong pump type (surface vs. submersible, DC vs. AC) is one of the most common and costly mistakes farmers make when building their first system.
- MPPT charge controllers can harvest up to 30% more energy from your solar array than PWM controllers — a difference that adds up fast in off-grid setups.
- Battery storage isn’t always necessary — in some setups, irrigating only during daylight hours can eliminate battery costs entirely and still meet your crop’s water demands.
- Keep reading to find out exactly how to size every component for your field, and when smart automation sensors can cut your water use dramatically.
Solar Irrigation Works Simpler Than You Think
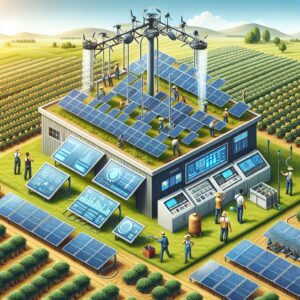
Strip away the technical jargon, and a solar-powered irrigation system is really just sunlight converted into water movement — a clean, reliable cycle that farmers worldwide are using to cut costs and grow more sustainably. Growing Solar Mist has been at the forefront of helping farmers understand and implement these systems in practical, affordable ways.
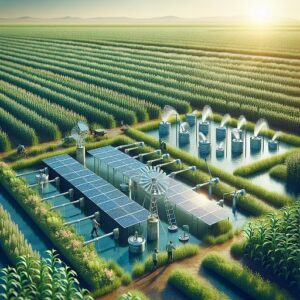
At its core, the system works like this: solar panels capture sunlight and convert it into direct current (DC) electricity. That electricity either flows straight to a DC water pump or passes through an inverter to power an AC pump. A charge controller regulates the flow of electricity to protect your batteries, and those batteries store energy for use when sunlight isn’t available. The pump then moves water from your source — a well, pond, or reservoir — through your irrigation network to your crops.
System Flow at a Glance:
☀️ Solar Panels → ⚡ Charge Controller → 🔋 Battery Bank → 🔄 Inverter (if AC pump) → 💧 Water Pump → 🌱 Irrigation Network
Every component has a specific job. Skip one or size it wrong, and the whole system underperforms — or fails entirely. That’s why understanding each part before you buy anything is the single most important step you can take.

Solar Panels: Where It All Starts
Solar panels are the engine of the entire system. Without the right type and the right amount of panel wattage, nothing downstream functions properly — not the pump, not the batteries, not the controller.
How Solar Panels Convert Sunlight into Usable Power
Solar panels are made up of photovoltaic (PV) cells, typically constructed from silicon. When photons from sunlight strike these cells, they knock electrons loose, generating a flow of direct current (DC) electricity. This raw DC power is what feeds the rest of your system. The amount of electricity generated depends on panel efficiency, the angle and orientation of the panels, local sunlight hours, and weather conditions. In agricultural applications, panels are typically mounted on fixed or adjustable ground-mount frames positioned to maximize sun exposure throughout the growing season.
Monocrystalline vs. Polycrystalline vs. Thin-Film vs. Bifacial Panels for Irrigation Use
Not all solar panels are created equal, and the type you choose will directly affect your system’s output and long-term value. For instance, different panels can be crucial when considering powering farm equipment with renewable energy. Here’s how the main types compare for irrigation use:
|
Solar Panel Type |
Efficiency Range |
Cost per Watt (Approx.) |
Key Advantages for Agriculture |
Limitations |
Best Farm Applications |
|---|---|---|---|---|---|
|
Monocrystalline Panels |
17–22% 1 |
$0.90–$1.50 2 |
High efficiency, compact design, long lifespan, performs well in all climates |
Higher upfront cost |
Space-limited farms, rooftops, and irrigation systems 1 |
|
Polycrystalline Panels |
13–17% 3 |
$0.70–$1.00 3 |
Lower cost, durable, long lifespan, strong in direct sunlight |
Requires more space, less efficient in cloudy conditions | |
|
Thin-Film Panels |
10–13% 5 |
$0.50–$0.90 2 |
Lightweight, flexible, better low-light/shaded performance |
Lower efficiency, shorter lifespan |
Greenhouses, barns, shaded or irregular terrain 5 |
|
Bifacial Panels |
18–22% 6 |
$1.00–$1.60 6 |
Captures light from both sides, high energy yield, great for reflective surfaces like grass or soil |
Higher cost, more complex installation |
Agrivoltaics (dual-use with crops), open-field installations 6 |
These four types of solar panels represent the most effective options for agricultural operations, allowing farmers to select between high efficiency (monocrystalline, bifacial) and lower-cost scalability (polycrystalline, thin-film) depending on land availability, sunlight exposure, and budget.
For most farming applications, monocrystalline panels hit the best balance of efficiency and durability. Bifacial panels — which capture light from both sides — are increasingly popular in large-scale agricultural setups where maximizing output per panel matters. Thin-film is rarely recommended for irrigation due to its low power density requiring significantly more surface area.
How to Size Your Solar Array for Your Water Needs
Sizing your solar array starts with knowing your pump’s power requirements. If your pump draws 1,500 watts and you need it to run for 6 hours per day, you need at least 9,000 watt-hours (Wh) of daily solar production. Factoring in typical system losses of around 20–25% from wiring, heat, and inverter inefficiency, you’d realistically need a solar array producing around 11,250–12,000 Wh per day. In a location averaging 5 peak sun hours daily, that means installing a 2,250 to 2,400-watt solar array at minimum.
Always build in a buffer of at least 15–20% above your calculated minimum. Dust accumulation, seasonal sun angle changes, and occasional cloud cover will reduce real-world output below the panel’s rated capacity. Undersizing your array is the fastest way to have a solar irrigation system that disappoints.
The Solar Water Pump: Heart of the System
The pump is where electricity becomes water movement — it’s the component your crops depend on most directly, and it’s where most first-time buyers make expensive mistakes. To understand more about the components of a solar water pump system, further reading can be beneficial.
Surface Pumps vs. Submersible Pumps
The choice between a surface pump and a submersible pump comes down entirely to your water source. Surface pumps sit above ground and are ideal for drawing water from open sources like ponds, streams, or shallow wells less than 25 feet deep. They’re easier to access for maintenance but are vulnerable to weather and theft. The Grundfos SQFlex submersible pump series, by contrast, is designed to sit directly in a borehole or deep well — often 100 to 400+ feet underground — and push water up to the surface.
Submersible pumps handle the high static head (vertical lift) demands that surface pumps simply can’t manage. If your water source is a deep borehole — which is common in water-scarce agricultural regions — a submersible DC solar pump is typically your only viable option.
One important distinction: submersible pumps push water upward, while surface pumps pull it. Pulling water over long vertical distances creates significant suction limitations that make surface pumps impractical for deep sources, regardless of how powerful the motor is.
DC vs. AC Powered Solar Pumps
DC solar pumps run directly off the DC electricity your panels produce, skipping the inverter entirely. This makes them simpler, more efficient, and less expensive to set up — and they’re the go-to choice for off-grid farms. AC pumps require an inverter to convert DC solar power to alternating current, which adds a component, cost, and a potential failure point. That said, AC pumps are often more powerful, more widely available, and easier to source replacement parts for in rural markets. Your choice depends on system scale, budget, and what’s serviceable in your region. For more information on how solar panels can power farm equipment, visit solar panels for farm equipment.
How to Match Pump Capacity to Your Field Size
Pump capacity is measured in two key metrics: flow rate (liters or gallons per hour) and total dynamic head (TDH), which accounts for both vertical lift and friction losses in pipes. A small 2-acre vegetable farm using drip irrigation might need only 500–1,000 liters per hour at low pressure, while a 20-acre field crop operation using overhead sprinklers could require 10,000+ liters per hour at significantly higher pressure. Undersizing your pump means your crops get insufficient water during peak demand. Oversizing wastes energy and money. Match the pump to your calculated peak daily water demand, not just your average.
Charge Controllers Keep Your System Safe
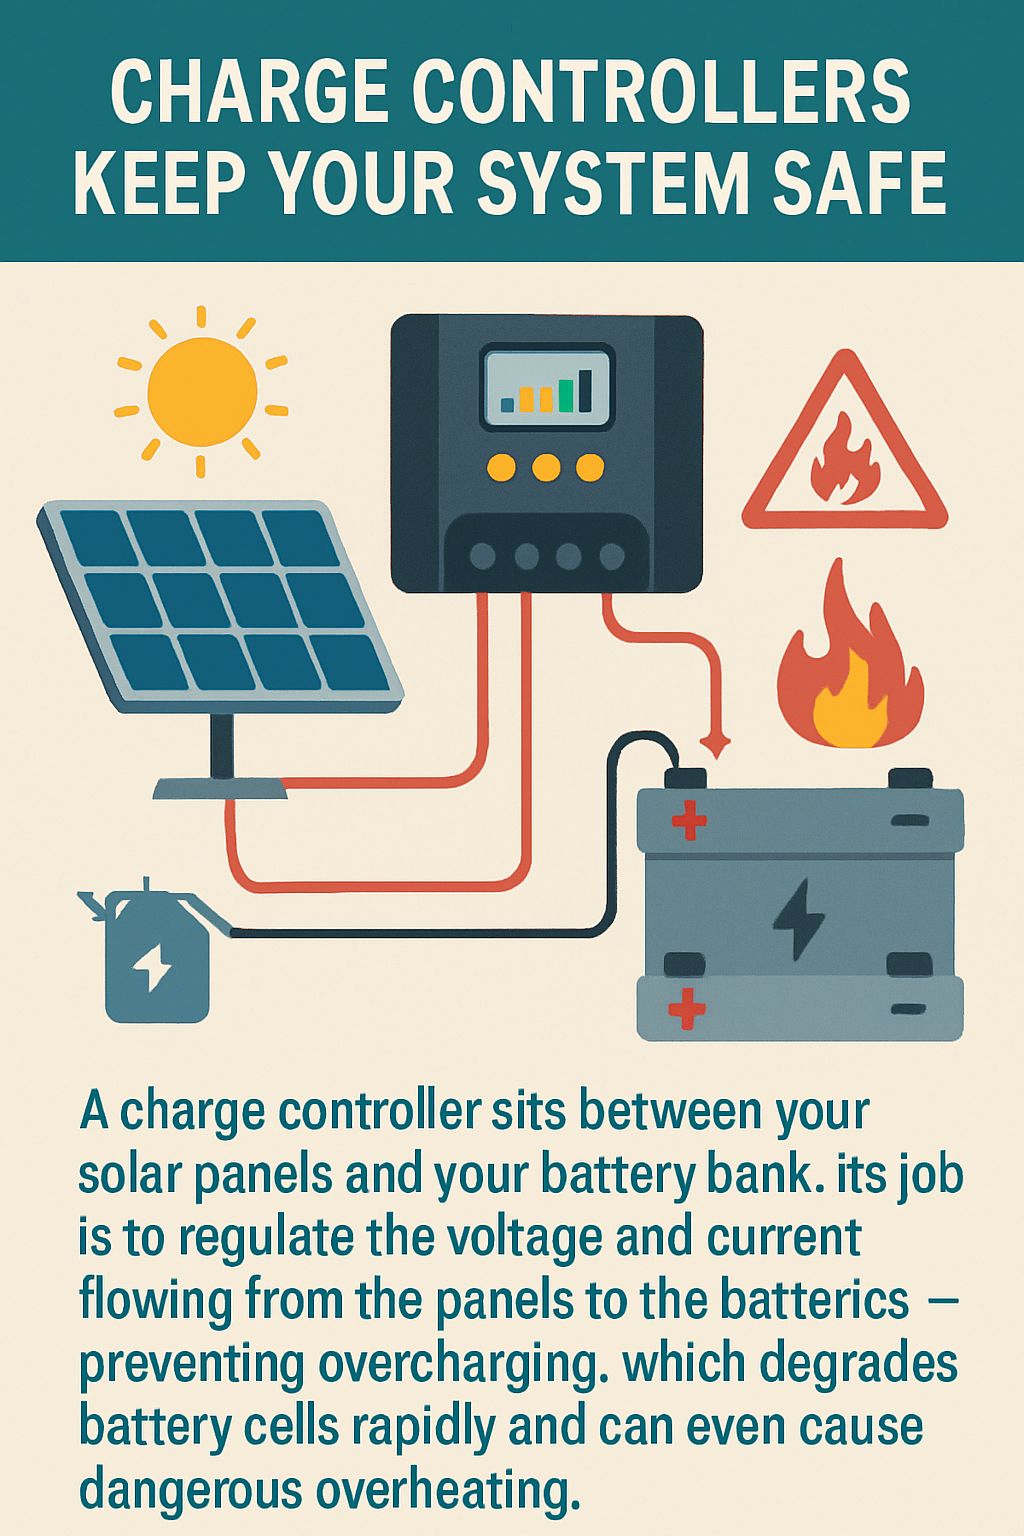
A charge controller sits between your solar panels and your battery bank. Its job is to regulate the voltage and current flowing from the panels to the batteries — preventing overcharging, which degrades battery cells rapidly and can even cause dangerous overheating.
Without a charge controller in any battery-based solar irrigation system, you’re running unregulated voltage directly into your battery bank. On a sunny day with a fully charged battery, this can push voltage far beyond safe limits. Most 12V batteries, for example, should never exceed 14.4–14.8V during charging — but an unregulated panel can easily push past this threshold.
PWM vs. MPPT Charge Controllers
There are two types of charge controllers used in solar irrigation systems: Pulse Width Modulation (PWM) and Maximum Power Point Tracking (MPPT). PWM controllers are simpler and cheaper, but they work by directly connecting the solar panel to the battery, which means the panel is forced to operate at battery voltage — often well below its optimal output voltage. MPPT controllers, on the other hand, continuously track the panel’s maximum power point and convert excess voltage into additional current, delivering significantly more energy to the battery bank.
In real-world terms, an MPPT controller like the Victron Energy SmartSolar MPPT 100/30 can harvest 20–30% more energy from the same solar array compared to a PWM controller — particularly in cold weather or low-light conditions where the voltage differential between panel and battery is greatest. For any system above 400 watts, the efficiency gains from an MPPT controller will typically pay back the price difference within one growing season. Learn more about how solar panels power farm equipment and enhance efficiency.
Why Skipping a Charge Controller Damages Your Battery Bank
Connecting solar panels directly to batteries without a charge controller is one of the most damaging mistakes in DIY solar irrigation builds. Overcharging causes lead-acid batteries to gas excessively, boiling off electrolyte and permanently reducing capacity. In lithium-ion batteries, overcharging triggers thermal runaway — a dangerous chain reaction that can result in fire. Either way, a battery bank that costs hundreds to thousands of dollars gets destroyed in weeks.
Even in systems where you plan to run the pump directly during daylight with no battery storage, a charge controller still protects your batteries if any storage component is present. It’s a non-negotiable component — and at $30–$150 for a quality PWM unit or $80–$300 for a solid MPPT controller, it’s also one of the cheapest forms of system protection available.
Battery Storage: Power When the Sun Goes Down
Battery storage is what separates a solar irrigation system that works only during peak sunshine from one that can water your crops at dawn, dusk, or on overcast days. Whether you need battery storage depends on your irrigation schedule, crop type, and whether your water source allows daytime-only pumping.
Lead-Acid vs. Lithium-Ion Batteries for Solar Irrigation
Flooded lead-acid batteries have been the default choice for off-grid solar storage for decades. They’re widely available, well-understood, and significantly cheaper upfront — a 200Ah flooded lead-acid battery typically costs $150–$250. The trade-off is a usable capacity of only 50% depth of discharge (DoD) to preserve lifespan, a lifespan of around 500–800 cycles, and regular maintenance requirements including electrolyte top-ups and equalization charging.
Lithium iron phosphate (LiFePO4) batteries — such as the Battle Born 100Ah 12V LiFePO4 — cost significantly more upfront (typically $800–$1,000 per 100Ah unit) but offer 80–100% usable DoD, 2,000–5,000+ cycle lifespans, and zero maintenance. For a permanent farm installation in a remote location, the lower total cost of ownership over 10 years often makes lithium the smarter financial choice despite the higher initial outlay.
How Many Batteries You Actually Need
Calculate your battery bank size by determining your daily energy consumption and how many days of autonomy you need — meaning how many consecutive cloudy days your system should handle without solar input. If your pump uses 1,500Wh per day and you want two days of autonomy using lead-acid batteries at 50% DoD, you need a battery bank of at least 6,000Wh (6kWh) of total rated capacity. In a 24V system, that translates to approximately 250Ah of battery storage at the 24V level.
When Battery Storage Is Not Worth the Cost
If your crops can be irrigated effectively between 9am and 4pm — when solar production is at its peak — and your water source allows flexible scheduling, you can eliminate battery storage entirely. Many drip irrigation systems for row crops operate perfectly well on a direct solar pump setup with no battery bank, reducing system cost by 30–40% and removing the maintenance burden entirely. In these cases, a simple timer or solar irradiance controller triggers the pump only when sufficient sunlight is available.
Inverters: Bridging DC Solar Power and AC Pumps
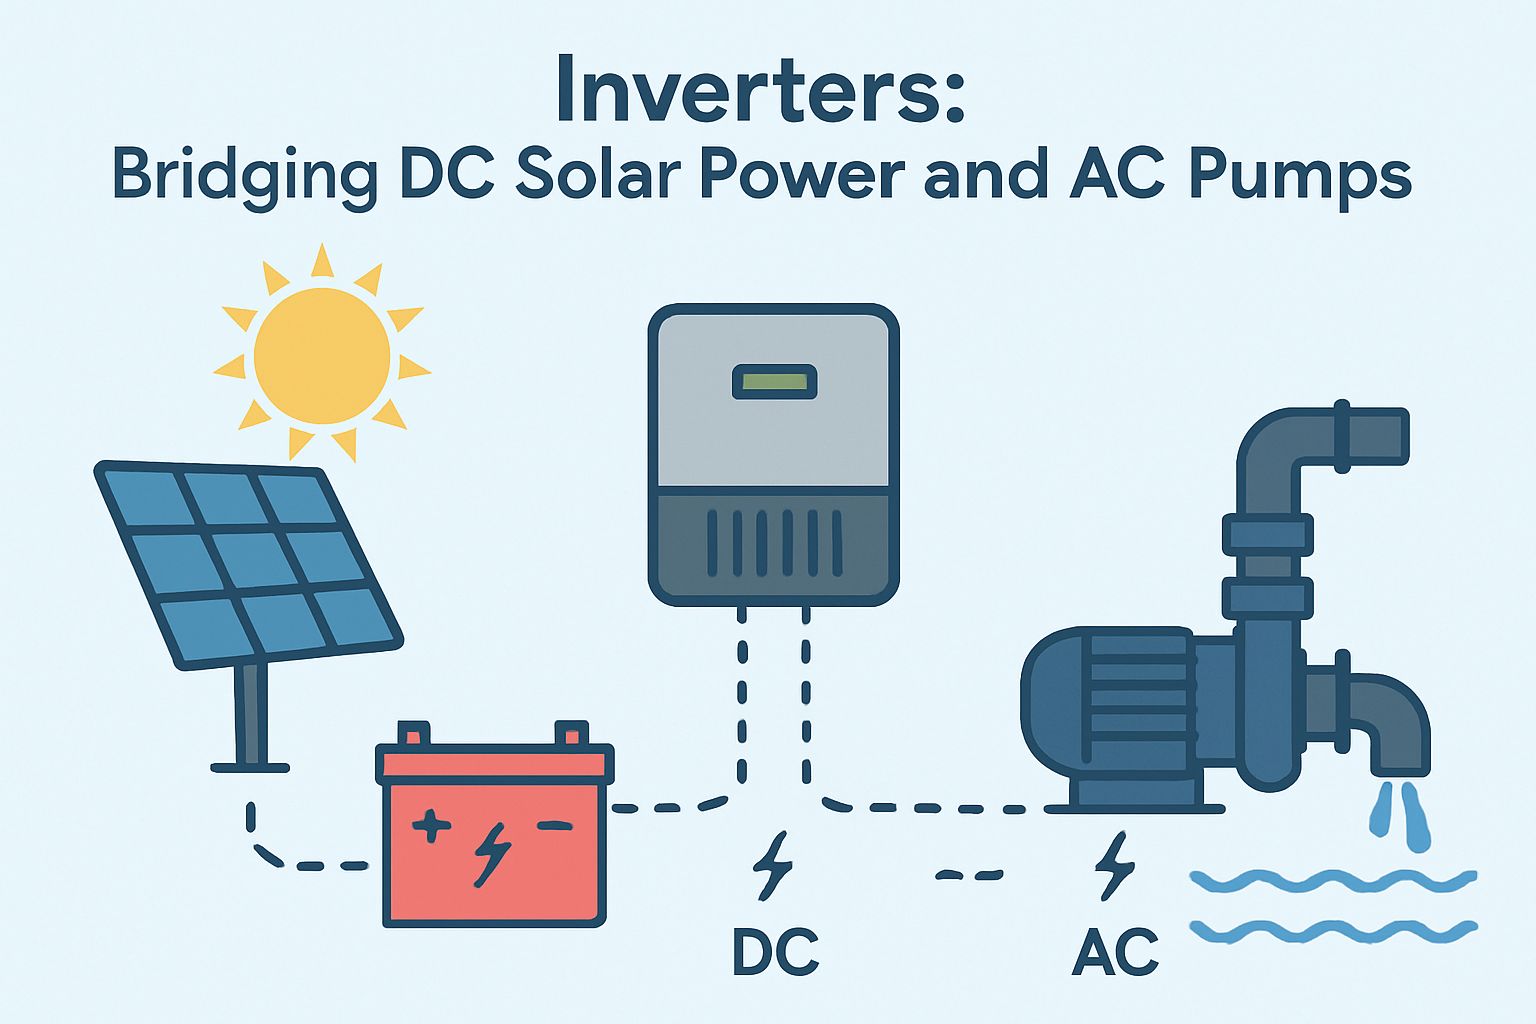
If you’re running an AC water pump — which is common when sourcing pumps locally in many agricultural markets — you need an inverter to convert the DC electricity from your panels and batteries into 120V or 240V AC power. The inverter’s continuous wattage rating must exceed your pump’s running wattage, and its surge capacity must handle the pump’s startup current, which can be 3–7 times the running draw. A Growatt SPF 3000TL LVM off-grid inverter, for example, pairs well with mid-sized agricultural pump setups, handling both solar input and battery charging in a single unit. For DC pump systems, skip the inverter entirely — it’s one less component to fail and one less source of energy loss.
The Irrigation Delivery Network
Once water leaves the pump, it needs a delivery network to get to your crops efficiently. This network consists of mainlines, sub-mains, lateral lines, emitters or sprinkler heads, filters, pressure regulators, and valves — and its design determines how evenly water reaches every plant in your field.
Poor delivery network design wastes water, creates dry spots, and can overload your pump with pressure demands it wasn’t sized to handle. The layout of your pipes should always match the topography of your land — running mainlines along ridges and laterals downslope wherever possible to use gravity as a free pressure assist.
Drip Irrigation vs. Sprinkler Systems for Solar-Powered Setups
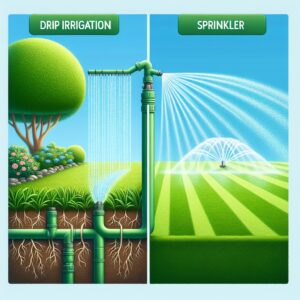
Drip irrigation is almost always the preferred choice for solar-powered systems. It operates at low pressure — typically 10–30 PSI — which means your pump works less hard, consumes less power, and your solar array can be smaller. Drip systems also deliver water directly to the root zone, reducing evaporation losses by up to 50% compared to overhead methods. For high-value crops like tomatoes, peppers, and berries, drip is the gold standard. Sprinkler systems require higher operating pressures (30–60 PSI or more) and significantly more pump power, which increases the size — and cost — of every upstream component in your solar system. They do, however, cover ground crops and pasture more effectively where drip layout isn’t practical.
Flow Control Valves and Pressure Regulators
Pressure regulators are critical in solar drip systems because pump output pressure fluctuates with solar intensity throughout the day. Without a regulator, high midday solar production can push your pump beyond the pressure tolerance of drip emitters, causing them to blow out. A simple inline pressure regulator — set to your system’s design pressure — costs as little as $8–$15 per zone and protects hundreds of dollars worth of drip tape. Flow control valves let you isolate individual zones for maintenance or staged irrigation without shutting down the entire system.
Smart Controllers and Automation
Automation transforms a functional solar irrigation system into a precision water management tool. Instead of manually starting and stopping pumps, smart controllers let you program, monitor, and adjust your entire irrigation schedule — sometimes from the other side of the world via a smartphone app. For farmers managing multiple fields or crops with different water requirements, automation isn’t a luxury. It’s what makes the system truly scalable and sustainable.
Soil Moisture Sensors That Prevent Overwatering
Soil moisture sensors are one of the highest-impact upgrades you can add to a solar irrigation system. Devices like the Vegetronix VH400 or the Sentek EnviroSCAN measure volumetric water content at the root zone in real time and send that data to your irrigation controller. When soil moisture drops below a set threshold, the system triggers the pump. When the target moisture level is reached, it shuts off — automatically, without any manual input. This prevents both underwatering and overwatering, which is critical because overwatering is just as damaging to most crops as drought stress.
Timer-Based vs. Sensor-Based Automation
Timer-based automation is the simpler and cheaper entry point. You program your controller to run the pump at set times and durations — say, 6am to 8am and 5pm to 6pm daily. It works reliably and is easy to manage, but it doesn’t account for rainfall, soil conditions, or temperature variation. A timer doesn’t know it rained overnight, so it will still run the pump on schedule, wasting water and energy. For a more efficient system, consider solar panels benefits that can optimize energy use on farms.
Sensor-based automation solves this by making irrigation decisions based on actual field conditions rather than a fixed schedule. Combined with a rain sensor or weather station input, a sensor-based controller like the Rain Bird ESP-TM2 or the Hunter HC can reduce water consumption by 30–50% compared to timer-only systems. For sustainable farming operations where water conservation is a priority, sensor-based control is worth every extra dollar spent.
Remote Monitoring Options for Off-Grid Farms
For farms in remote areas without reliable on-site supervision, remote monitoring gives you eyes on your system from anywhere. The Victron Energy VRM Portal — used with compatible Victron charge controllers and inverters — provides real-time data on solar production, battery state of charge, and system alerts via a smartphone app or web dashboard. GSM-based data loggers can transmit system performance data over cellular networks even in areas without internet infrastructure. Some farmers pair these monitoring systems with SMS alert functions that send a text message if the pump stops unexpectedly, a battery drops below a critical threshold, or a sensor reads an anomaly — giving you the ability to respond before crops are stressed. For more insights on managing solar energy in agriculture, explore the benefits of solar panels for farm equipment.
Every Component Works Together or the System Fails
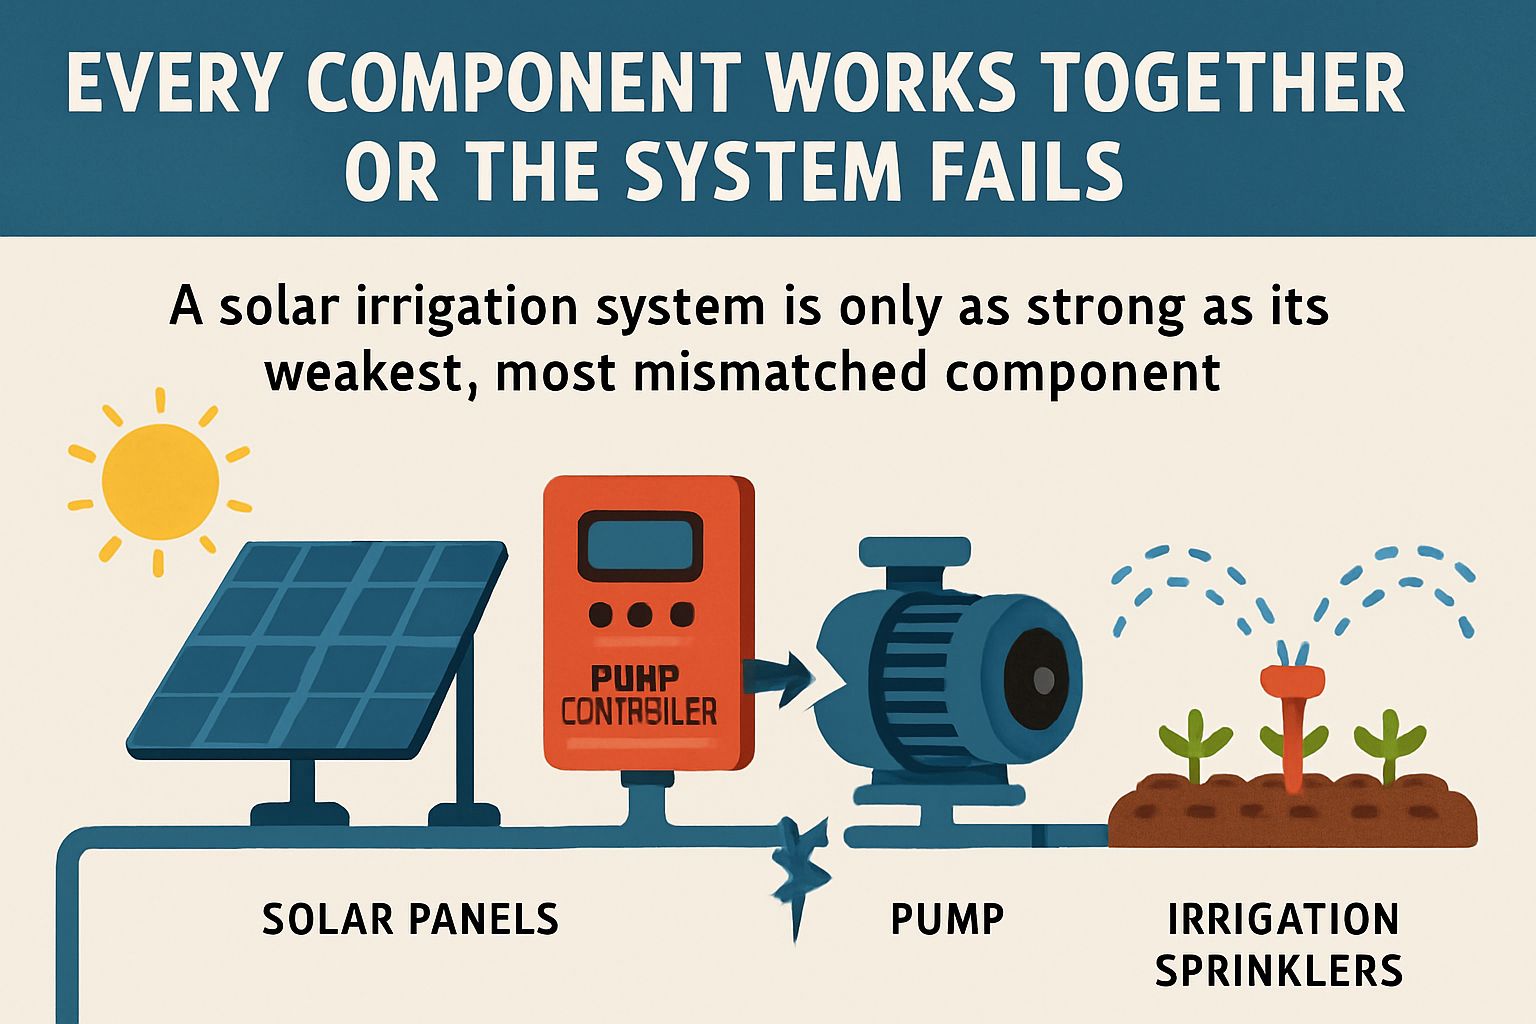
A solar irrigation system is only as strong as its weakest, most mismatched component. Oversizing your solar array but undersizing your battery bank leaves you with stored energy you can’t use effectively. Pairing a high-flow pump with undersized pipes creates pressure losses that slash delivery efficiency. Running an AC pump through a cheap, undersized inverter causes voltage sags that burn out the motor. Every component has to be sized and selected in relation to every other component — not in isolation.
The practical approach is to start with your water demand, work backwards to determine pump requirements, then build the electrical system — solar array, charge controller, battery bank, and inverter — around powering that pump reliably through your longest expected period of low solar production. Get this sequence right, and your system will run for 20+ years with minimal intervention. Get it wrong, and you’ll spend more on repairs and replacements than you saved on electricity.
Frequently Asked Questions
These are the questions farmers ask most often when building or evaluating a solar-powered irrigation system — answered directly and without the fluff.
Can a Solar Irrigation System Work on Cloudy Days?
Yes — but with reduced output. Solar panels still generate electricity on cloudy days, typically producing 10–25% of their rated capacity depending on cloud density. If your system includes a properly sized battery bank, stored energy from previous sunny days will cover the gap. In a battery-free direct-drive system, a cloudy day means reduced pump flow or no pumping if light levels drop too low to meet the pump’s minimum startup voltage. This is why system design should always account for your region’s average number of overcast days during the growing season, not just peak sun hours.
How Long Do Solar Panels Last on an Irrigation System?
Typical Solar Panel Lifespan by Component:
Component
Expected Lifespan
Key Degradation Factor
Monocrystalline Panels
25–30 years
~0.5% annual output degradation
Polycrystalline Panels
20–25 years
~0.7% annual output degradation
MPPT Charge Controller
10–15 years
Heat and voltage spikes
Lead-Acid Batteries
3–7 years
Depth of discharge and temperature
LiFePO4 Batteries
10–15 years
Cycle count and charge management
Submersible DC Pump
5–15 years
Water quality and run-dry events
Quality solar panels from manufacturers like Canadian Solar or JA Solar typically come with a 25-year linear power output warranty, guaranteeing that panels will still produce at least 80% of their rated capacity after 25 years. In agricultural environments where panels are exposed to dust, humidity, UV radiation, and temperature swings, real-world degradation rates tend to land between 0.5–0.8% per year. For more information on the components of a solar water pump system, you can refer to this informative article.
The panels themselves are almost always the longest-lasting component in the system. What typically fails first are the batteries, followed by pumps — especially in areas with sandy or sediment-heavy water that accelerates pump wear. Protecting your submersible pump with an inline sediment filter is one of the simplest ways to extend its operational life significantly.
Regular maintenance makes a measurable difference. Cleaning panels quarterly to remove dust and bird droppings, checking wiring connections annually for corrosion, and inspecting battery terminals can keep a well-designed system running at near-peak efficiency for decades.
Do I Need Batteries for a Solar Irrigation System?
Not always. If your crops can be irrigated effectively during daylight hours — typically between 8am and 5pm — and your water source allows flexible scheduling, a battery-free direct-drive solar pump system is a perfectly viable and significantly cheaper option. Many small and mid-scale farms operate exactly this way. Batteries become necessary when you need to irrigate before sunrise or after sunset, when you need consistent pump pressure regardless of cloud cover, or when your crops are sensitive to any interruption in water supply. Assess your irrigation timing requirements honestly before deciding — batteries add cost, maintenance, and eventual replacement expense that may not be justified by your specific operation.
What Size Solar Panel Do I Need to Run a Water Pump?
Start with your pump’s wattage rating. A common 0.5 HP (373W) DC submersible pump running for 7 hours per day needs approximately 2,611Wh of daily solar energy. Adding a 20% efficiency buffer brings that to roughly 3,133Wh per day. Divide that by your location’s average peak sun hours — say, 5 hours — and you need a solar array of approximately 627 watts for that pump alone.
If you’re also charging a battery bank, add those charging requirements to your daily energy calculation before sizing your array. A common mistake is sizing only for the pump and forgetting that the charge controller, control electronics, and battery charging inefficiency all draw additional power from the array.
As a rough guide for common pump sizes:
- 0.5 HP pump: 600–800W solar array
- 1 HP pump: 1,200–1,600W solar array
- 2 HP pump: 2,400–3,000W solar array
- 5 HP pump: 5,500–7,000W solar array
Can I Expand My Solar Irrigation System After Installation?
Yes — and planning for future expansion from the start is one of the smartest things you can do. When purchasing your charge controller and inverter, buy one rated for at least 25–30% more capacity than your current system requires. Adding solar panels later is straightforward if your charge controller has headroom; it becomes expensive if you have to replace the controller entirely just to add two more panels. For more insights, explore how solar panels power farm equipment with renewable energy.
Battery bank expansion is similarly straightforward with lithium systems — you can add battery modules in parallel as your budget allows, as long as you match battery chemistry, voltage, and ideally manufacturer. Mixing old and new lead-acid batteries in the same bank, however, degrades the entire bank to the weakest battery’s level and should be avoided.
On the irrigation side, most drip and sprinkler networks can be extended by adding zones controlled by additional solenoid valves tied to your existing controller — provided your pump has sufficient flow capacity to handle the added demand. If you anticipate significant expansion within the first five years, sizing your pump one step larger than your immediate needs during initial installation is almost always more cost-effective than replacing it later. For more guidance on building and expanding a solar irrigation system that grows with your farm, Growing Solar Mist offers practical resources tailored to sustainable farmers at every scale.

Leave a Reply